
Add 360°Photos to Your Website
How to Add a 360° Virtual Tour to Your Website
Once your 360° virtual tour has been published to Google, you can easily embed the virtual tour in your website.
The 360° virtual tour is hosted on Google and visitor traffic does not count against your website’s bandwidth.
There are two important components to adding the tour to your website: The starting position of the tour and the website platform you are using.

Get Your Starting Position
When choosing your staring position, think about which 360° photo do you want your website visitors to see first? Do you want them to see your storefront first? Would you want them to see your lobby first? You can choose any position within your virtual tour that you like.
First we will go through the steps to locate and save your 360° virtual tour’s starting position so it can be added to your website.
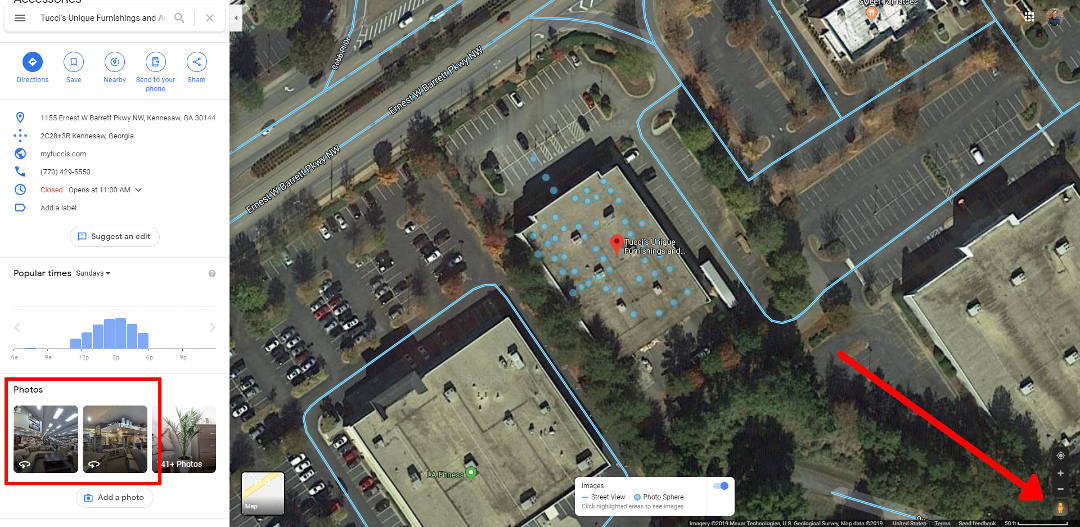
Step 1: Find Your Tour on Google Maps
Go to Google Maps and search for your business location.

Step 2: Enter Your Tour and Find The Best Spot
Click one of the 360° photo action buttons on the business listing on the left panel (outlined in red in the picture) or use the yellow stickman on the lower right and then select one of the blue dots to enter your virtual tour.
Next, navigate the tour to find a perfect starting position photo sphere and point the camera in the desired direction.
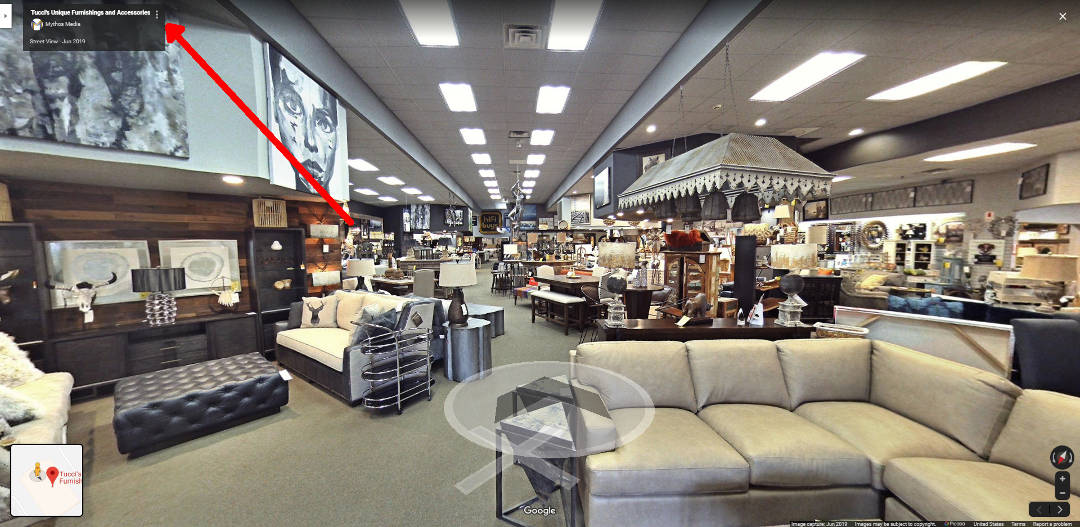
Step 3.1: Get Your Tour Embed Code
Once you have the desired starting position of the tour displayed, click the “3 vertical dots” menu on the top left near your business name.
Step 3.2
Then select “Share or embed image”.

Step 3.3
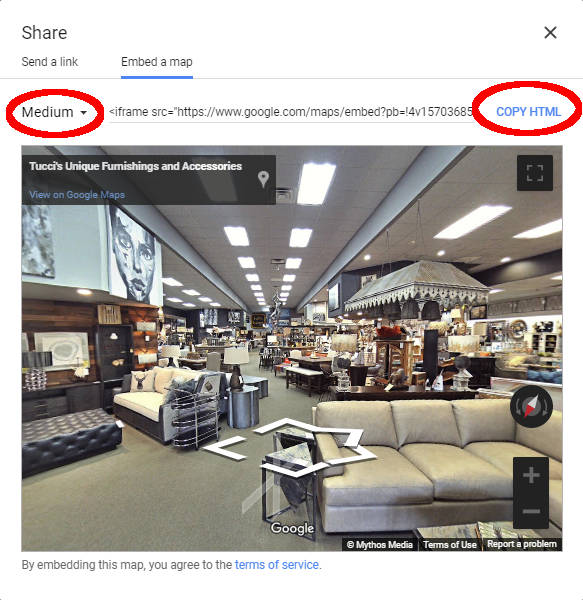
On the Share pop-up, select “Embed a map”.

Step 3.4
The virtual tour, image size, and html code will then be displayed.
Select the image size on the drop down and then click “COPY HTML”.
Open a text document or blank email draft. Paste the HTML (ctrl+v) for safe keeping.
The full embed code will look similar to this:
<iframe src=”https://www.google.com/maps/embed?pb=!4v1570442623074!6m8!1m7!1sCAoSLEFGMVFpcE15Rk5zWUpDQ2k2LWh1SzJpSGpZa1lRaDROa1lDQk9hR1RCSld2!2m2!1d34.0002865633972!2d-84.58304914834946!3f143.72763481287652!4f-5.418296856668931!5f0.7820865974627469″ width=”600″ height=”450″ frameborder=”0″ style=”border:0;” allowfullscreen=””></iframe>
Now you are ready to insert the virtual tour into your website!
Step 4: Insert the Virtual Tour Embed Code to Your Website
The last step is to insert the embed code into a page or post on your website. This is accomplished by pasting the embed code into a HTML element on your desired page or post.
The most popular website platforms have a few subtle differences when adding content. Choose the tab with the name of the platform your website is currently using. You will see instructions for embedding the code you just copied.
 WordPress is the most popular and customizable website content management system in the world. If your website uses WordPress, follow the steps below.
- Create a new or open an existing page/post.
- Use the editor on your desired page or post. Switch the editor view from Visual to Text on the right side.

- Paste (ctrl+v) the embed code into the editor contents.
- Save your changes.
 Divi is a very popular page builder framework that runs on WordPress. Divi uses modules to manage and display content. Here is how you can add your virtual tour on Divi.

- Add your desired section, row, and column structure
- Add a Code Module
- Paste the embed code into the Code Module content area.
- Save your changes.
 WordPress.org is the managed website service that uses the scaled down edition of WordPress. If your website is hosted by WordPress.org, use these steps.

- Add a Custom HTML Block to your page or post.
- Paste (ctrl+v) the embed code into the content field.
- Save your changes.
Visit this WordPress.com support page for additional details on using Custom HTML Blocks.
 Login to your Joomla Admin panel, then go to Extensions on the menu bar > choose Modules > Click New to start a new module.
- Select Custom as the module type.
- Give the new module a name in the Title field.
- On the lower right corner of the editor, click the Toggle editor button to change the mode to plain text.

- Paste (ctrl+v) your embed code into the content area.
- On the right sidebar, click Select Position to choose the location to place the module in the website layout.

- To select what menu items display the virtual tour modeule in a Joomla website, navigate to the Menu Assignment tab and select the desired box.
- Press the Save button to finish the module.
 Open the Squarespace page where you would like to embed the virtual tour.
- Hover over your page content and select Edit.
- Click an insertion point, select a Code Block, then paste the embed code into the block.
- Save your changes.
Note: Check this page to verify that your Squarespace plan is eligible for Code Blocks as their features and pricing plans change frequently.
 Open the Wix editor
- Choose the Add button and select the More option
- Click on the HTML code button
- Click the Enter Code button that appears above the grey box.
- Paste your embed code into the space provided.
The embed code will then display a preview that can be moved or scaled into your desired position.
Pro Tip
- You can manually edit the height= and width= values in the embed code to customize the dimensions of the virtual tour.
Get Started Today
Let's have a conversation. Book a date and time that best suits your schedule.